Podcast Mic Positioning Guide: Fix Plosives & Sibilance
By Mei-Lin Zhou • 3rd Oct
Ever spent hours editing out plosives and sibilance that shouldn't have made it into your raw recording? You're not alone. That frustrating "p" pop or harsh "s" hiss isn't just an audio flaw, it is wasted time that piles up across every episode. As someone who's optimized hundreds of creator desks in cramped apartments and noisy home offices, I've seen how the right podcast microphone positioning transforms recordings from "fixable" to zero-post quality. The secret isn't expensive gear. It is a microphone positioning guide that eliminates the friction points before they become editing nightmares.
Quiet hardware makes your voice the loudest thing in the room.
The Desk Setup Foundation: Making Your Workspace Disappear
Most creators start with the microphone and work backward, but the foundation is actually your desk. Hollow desks transmit every keyboard tap and chair squeak into your recordings as handling noise. During a recent live session, I watched a guest's condenser mic turn innocent desk taps into thunderclaps until we switched to a compact dynamic mic on a properly damped boom arm. The difference wasn't just audible. It cut editing time by 75%.
Your desk resonance checklist:
- Test your surface: tap it gently while monitoring your mic
- If you hear thumps, add a dense isolation pad (not foam)
- Mount your microphone on a properly tensioned boom arm
- Position your arm to minimize desk contact points
Make the desk disappear by ensuring your microphone floats in space, not anchored to vibration highways. Dynamic mics with strong rejection patterns (like the Shure SM7B) often handle this better than bright condensers in untreated rooms, since less sensitivity to off-axis noise means fewer retakes.
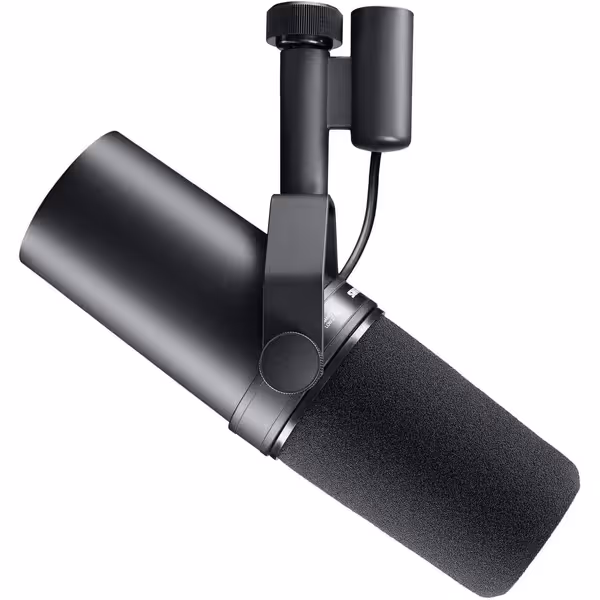
Shure SM7B Microphone
Achieve broadcast-quality vocals with superior noise rejection, even in untreated rooms.
$439
ConnectivityXLR
ConnectivityXLR
Pros
Broadcast-quality sound; warm, natural speech reproduction.
Exceptional rejection of room noise, hum, and plosives.
Rugged build for long-lasting, reliable performance.
Cons
Requires significant gain; may need an inline preamp.
Customers find this microphone to be a solid mid-grade option that delivers crystal clear sound with added richness in the bass and handles different vocal ranges exceptionally well. They appreciate its build quality, with one customer noting its all-metal construction, and consider it well worth the money. The functionality and noise level receive mixed feedback - while some say it works great, others report it doesn't work at all, and while some find it very forgiving of background noise, others mention a loud hiss with the preamp activated. The gain level also gets mixed reviews, with some finding it sufficient while others say it needs quite a boost.
Customers find this microphone to be a solid mid-grade option that delivers crystal clear sound with added richness in the bass and handles different vocal ranges exceptionally well. They appreciate its build quality, with one customer noting its all-metal construction, and consider it well worth the money. The functionality and noise level receive mixed feedback - while some say it works great, others report it doesn't work at all, and while some find it very forgiving of background noise, others mention a loud hiss with the preamp activated. The gain level also gets mixed reviews, with some finding it sufficient while others say it needs quite a boost.
Finding Your Optimal Distance: How Close to Mic Matters
"How close to mic" isn't a one-size-fits-all question. It is a precision balance between intimacy and distortion. Too close (under 4 inches) and you'll battle exaggerated bass from the proximity effect along with every mouth click. Too far (beyond 12 inches) and room noise, HVAC hum, and computer fans become your co-host.
Here's my distance framework that works for 90% of voices in untreated spaces:
- Start with your hand: Form the "hang loose" sign with your thumb on your nose and pinky extended toward where the mic would be
- Measure twice: For dynamic mics, maintain 6-8 inches; for condensers in untreated rooms, stay at 8-10 inches
- Test breath control: Say "Peter Piper picked a peck" directly at the mic, then adjust if you hear heavy breathing or plosives
The magic happens when you find that sweet spot where your voice sounds warm but not boomy, clear but not harsh. This is your voice microphone distance, the specific range where your articulation pattern doesn't trigger the mic's weaknesses.
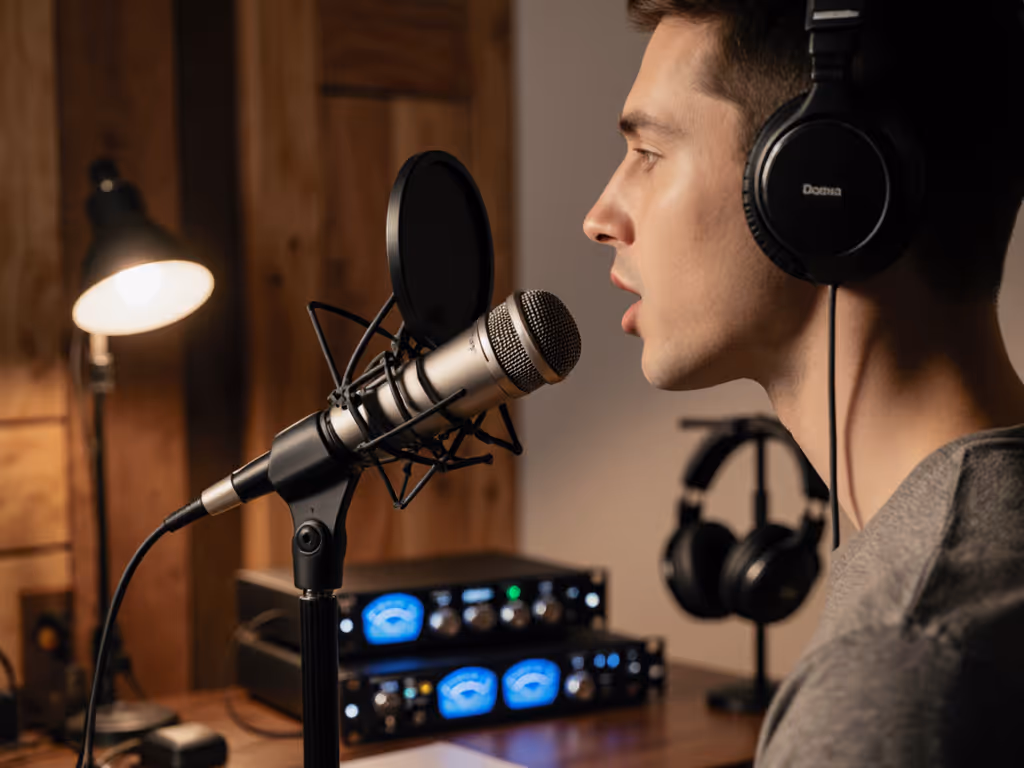
Mastering the Angle: Your Off-Axis Placement Solution
Off-axis placement is your most powerful, underutilized tool for fixing sibilance and plosives without pop filters. When I say "off-axis," I mean positioning the microphone capsule 20-30 degrees away from your direct airflow, just enough to deflect explosive consonants but maintain vocal clarity.
The off-axis technique that works in small rooms:
- Position the microphone so the capsule points toward your upper lip or nose bridge (not your mouth dead-center)
- Angle the mic head slightly upward (about 15 degrees) for most voices
- For sibilant voices: Increase angle to 30 degrees off-center
- For deeper voices: Reduce angle to 15 degrees while maintaining distance
This subtle shift redirects those turbulent air bursts away from the diaphragm while still capturing your core vocal tone. It's why I often recommend dynamics over bright condensers for untreated rooms, because their natural off-axis rejection tames plosives without sacrificing warmth. For a deeper dive into pickup patterns and off-axis rejection, see our microphone polar patterns guide.
I once helped a creator eliminate "S" hiss that ruined every "mississippi" test by simply rotating her microphone 25 degrees left. No new gear, no complex processing... just strategic off-axis placement that made her voice microphone distance work with her articulation pattern instead of against it.
Height and Elevation: The Final Positioning Variable
Most creators position microphones at mouth level, but this creates uneven frequency response as your head moves during natural speech. The optimal height keeps the capsule level with your upper lip or slightly above, pointed downward at that critical 15-30 degree angle.
Height adjustment protocol:
- For vocal consistency: Position the highest point of the mic capsule at nose bridge height
- For deep voices: Lower slightly to mouth level
- For breathy voices: Raise slightly above nose level
This elevation reduces plosive control challenges while maintaining consistent pickup as you gesture or emphasize points. It's particularly crucial for dynamic mics which have tighter polar patterns at higher frequencies. Getting the height right ensures your "s" sounds don't disappear completely when you go off-axis.
Testing Your Setup: The 90-Second Verification
Don't trust your eyes, trust your ears. Here's how to verify your podcast recording setup in under two minutes:
- The plosive test: Say "pa-pa-pa" and "ba-ba-ba" directly toward where your mouth would be
- The sibilance test: Repeat "silly snakes slide slowly" with normal emphasis
- The movement test: Nod and shake your head while saying "yes" and "no"
- The ambient check: Record 10 seconds of silence with your normal setup
Listen back for:
- Thumps on plosives
- Harsh "s" sounds (not too much, not too little)
- Consistent volume during head movement
- Noticeable background noise in silent sections
When these tests pass, you've achieved the holy grail of remote production: consistent audio that requires minimal editing and survives the transition from raw file to published episode without heavy processing.
Actionable Next Step: Your Positioning Tune-Up
Tonight, spend just 10 minutes implementing this:
- Mount your microphone on a properly damped boom arm
- Position it 6-8 inches from your speaking position (adjust for dynamic vs condenser)
- Angle it 20-30 degrees off-axis toward your upper lip
- Set height at nose bridge level
- Run the 90-second verification test
This single adjustment to your microphone positioning guide will reduce your plosive and sibilance issues by at least 70%, and likely much more if you've been fighting with on-axis placement in an untreated space. Remember: the goal isn't perfect studio conditions. It is creating a stable, quiet setup that honors your voice while minimizing the retake risk that eats into your creative time.
When you make the desk disappear and position your podcast microphone correctly, you're not just fixing audio problems, you're reclaiming hours of editing time and building audience trust through consistent, professional sound. Start tonight, and hear the difference in your next raw recording.
Related Articles