Shure SM7B: Podcast Mic Worth the Investment?
By Luis Cabrera • 3rd Oct
Let’s cut through the hype: the Shure SM7B dynamic microphone isn't just a podcaster's trophy, it's a tool. But is it worth your hard-earned cash when you're recording in a bedroom with a $200 interface? If you've ever asked "is SM7B good for podcasting" while staring at a Cloudlifter price tag, you're not alone. I've seen too many creators burn $800 chasing "studio quality" only to drown in gain stages and buyer's remorse. Today, we'll map a price-to-performance path that respects your budget, your room, and your sanity. Because smart upgrades preserve investments; sequence matters more than chasing the trend of the month.
Why the SM7B Obsession Isn't (Always) Rational
You've heard it everywhere: "Get an SM7B! It's the podcaster's mic!" But here's the room reality many skip: Shure's legendary dynamic workhorse outputs -59.0 dB, a whisper-quiet signal. Most beginner interfaces (like the ubiquitous Focusrite Scarlett Solo) max out at +55dB gain. To dial in clean levels with any setup, follow our gain staging guide. Translation? You'll clip your preamp before hitting healthy levels, forcing you into a $150-$300 accessory rabbit hole. And that's before tackling plosives, desk thumps, or the dreaded 'proximity effect' boom in untreated rooms.
The pain isn't theoretical. Last year, a client, a brilliant educator running a YouTube course from her closet, bought an SM7B based on 'top 10' lists. Her raw tracks were a mess: tinny when pulled back, muddy when close, buried under HVAC noise. She'd spent $650 only to need more gear: an audio interface upgrade and a Cloudlifter. Her total cost of setup? $980. For one voice. No wonder she whispered: "I feel like I'm failing at basic audio."
This is the trap: spec sheet paralysis meets review distrust. Demos use pristine studios, heavy compression, and engineers who'll never record with street noise outside their window. You don't need "the best mic", you need the right mic for your voice, your room, and your upgrade path.
The SM7B's Secret Weapon (and Its Achilles' Heel)
Here's what the hype doesn't scream: the SM7B's cardioid polar pattern is exceptional at rejecting off-axis noise. In a world of echoey bedrooms and chatty housemates, that's pure gold. Its 50-20,000 Hz frequency response delivers warm, broadcast-ready lows while taming sibilance, if you activate the mid-range boost switch. But its superpower is also its flaw: that tight pattern demands consistent placement. One inch closer? Boomy bass. Nodding slightly? Dull mids. And in untreated spaces? It'll capture every keyboard clack and AC hum unless mounted perfectly.
The truth many reviewers gloss over: An SM7B shines only when its entire chain, interface, gain, shock mount, position, is tuned for your voice and space. Otherwise, it's a paperweight costing $400+.
Why 'Just Add a Cloudlifter' Isn't a Fix-All Solution
Enter the Cloudlifter CL-1, the $149 "miracle box" thrown at every SM7B newbie. It delivers clean +25dB gain by converting phantom power, bypassing your interface's noisy preamp. For many, it's essential. But it's not free money. Let's model the total cost of setup:
- SM7B Mic: $399
- Cloudlifter CL-1: $149
- XLR Cable: $15
- Subtotal: $563 (before interface, arm, or pop filter)
Suddenly, your "affordable pro mic" costs more than a full USB setup (like a $129 Yeti X + arm). And if your interface still lacks clean gain? You're back at square one. I've seen students add a Cloudlifter to a $99 Behringer interface only to get more hiss. Price-to-performance plummets when accessories outpace the core investment.
The Upgrade Path That Keeps Earning Its Place
Remember that student newsroom I mentioned? We built a four-mic interview rig for $498 using mismatched gear. The secret? We treated the mic as one phase of a longer journey, not a destination. Here's how to apply that room reality to your SM7B setup guide:
Phase 1: Start USB (Seriously)
If you're under $300 total, skip the SM7B. Get a quality USB dynamic mic (like a $99 Samson Q2U). Why?
- Zero latency monitoring (critical for long interviews)
- No gain anxiety, it works with any laptop
- Reusable shock mount/arms later
You'll sound cleaner today while saving for Phase 2. Buy steps, not regrets.
Phase 2: The SM7B-Ready Leap ($450-$700)
Ready for XLR? Don't buy the mic first. Prioritize:
- Interface: Focusrite Scarlett 2i2 ($169) (2 clean preamps, direct monitoring)
- Arm + Shock Mount: Neewer NB-33 (included in $229 bundle)
- Then the mic: SM7B or SM7dB (see comparison below)
This sequence reuses 100% of your gear when upgrading to multi-host setups. No stranded USB mic. No useless Cloudlifter.
Phase 3: The SM7B(dB) Decision
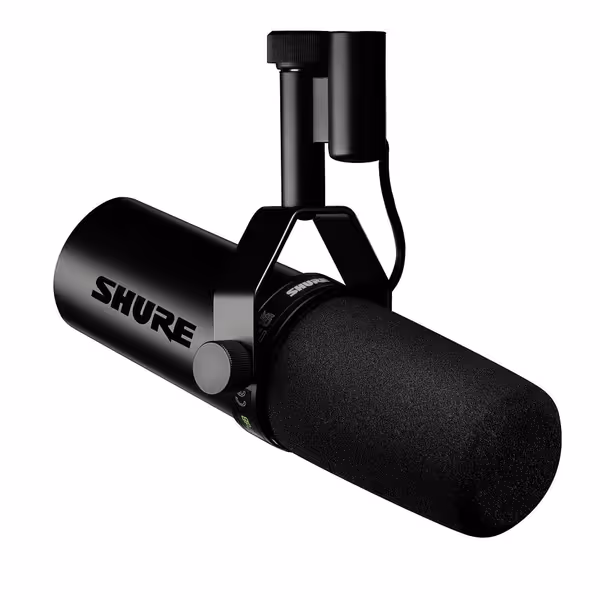
Shure SM7dB Dynamic Vocal Microphone
Legendary vocal tone with built-in preamp for easy, clean gain.
$549
Built-in Preamp Gain+18dB or +28dB
Built-in Preamp Gain+18dB or +28dB
Pros
Retains iconic SM7B sound profile and clarity.
Eliminates need for external inline preamps.
Excellent background noise rejection for untreated rooms.
Cons
Preamp can introduce hiss for some users.
Customers find this microphone to be a solid mid-grade option that delivers crystal clear sound with added richness in the bass and handles different vocal ranges exceptionally well. They appreciate its build quality, with one customer noting its all-metal construction, and consider it well worth the money.
Customers find this microphone to be a solid mid-grade option that delivers crystal clear sound with added richness in the bass and handles different vocal ranges exceptionally well. They appreciate its build quality, with one customer noting its all-metal construction, and consider it well worth the money.
SM7B vs. SM7dB: Which Fits Your Upgrade Path?
| Feature | Standard SM7B | SM7dB (Built-in Preamp) |
|---|---|---|
| Price | $399 | $549 |
| Gain Needs | Requires Cloudlifter (+$149) | Built-in +18dB/+28dB gain |
| Total Chain Cost | $563+ | $549 (no Cloudlifter needed) |
| Best For | Pros with high-end interfaces | Beginners; mobile setups |
| Room Reality | Risky with budget interfaces | 'Plug and play' on Scarlett 2i2 |
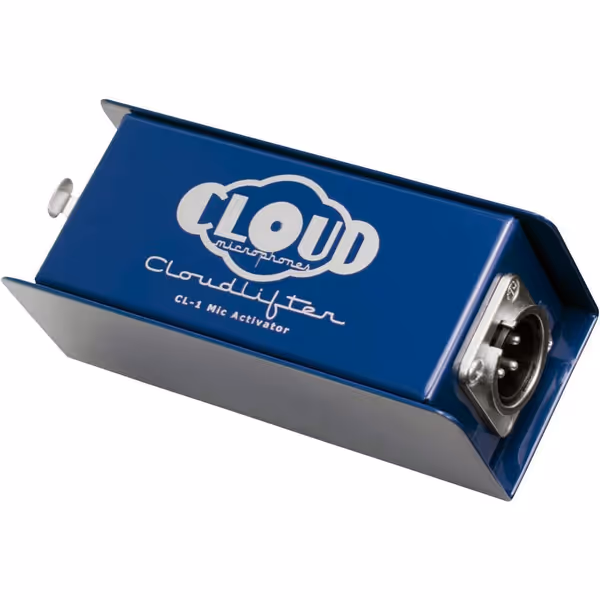
Cloudlifter CL-1 Mic Activator
Boosts quiet mics +25dB, eliminates noise, preserves natural sound.
$149
Clean Gain Boost+25dB
Clean Gain Boost+25dB
Pros
Dramatically improves sound for dynamic/ribbon mics.
Eliminates interface hiss; ideal for low-output mics (e.g., SM7B).
Reduces background noise for broadcast-ready audio.
Cons
Requires phantom power from your interface/preamp.
Customers find the mic activator works fantastically, particularly with the SM7B microphone, and appreciate its clean gain boost of 25dB. The device makes microphones clear of background sounds, has no added noise, and is constructed of metal. They consider it worth the price and essential for both dynamic and ribbon microphones, with one customer noting its suitability for location and event productions.
Customers find the mic activator works fantastically, particularly with the SM7B microphone, and appreciate its clean gain boost of 25dB. The device makes microphones clear of background sounds, has no added noise, and is constructed of metal. They consider it worth the price and essential for both dynamic and ribbon microphones, with one customer noting its suitability for location and event productions.
Why the SM7dB Might Be Your Smartest Move
That student newsroom? We'd have killed for the SM7dB. Its built-in preamp (bypassable for pro rigs) delivers +28dB clean gain, exactly what a Scarlett 2i2 needs to hit -18dB without noise. No extra boxes. No cable clutter. You plug straight into your interface, flip the gain switch, and record. For $150 more than the standard SM7B, you eliminate the Cloudlifter cost and complexity. And Shure's data confirms it: 60 dB SNR (vs. 55 dB on the SM7B + Cloudlifter combo) means less hiss in quiet rooms.
Key upgrade insight: If you're using a sub-$300 interface (90% of beginners), the SM7dB's price-to-performance exceeds the SM7B + Cloudlifter path. You're not paying for 'convenience' you are avoiding $150 in forced accessories. Total cost of setup drops despite the higher mic price.
When to Stick With SM7B + Cloudlifter
Only choose the standard SM7B if:
- You already own a high-end interface (UA Apollo, RME) with pristine gain
- You'll use it for live instruments (drums/guitar cabs) where the SM7dB's max +28dB clips
- Budget is tight now but you'll add a Cloudlifter later (reuse the preamp when upgrading interfaces)
Otherwise, the SM7dB short-circuits the upgrade path. Sequence upgrades so each piece keeps earning its place.
Your Real-World SM7B Setup Checklist
Forget 'studio specs'. Here's what actually matters in your space:
Step 1: Test Your Room First
- Record a sentence with your phone mic. Heavy echoes? Prioritize $20 foam panels (not the mic).
- Hear HVAC noise? Position the mic away from vents, SM7B's cardioid pattern needs strategic placement.
Step 2: Mic Technique > Gear
- Distance: 6-8 inches (not 2 inches!) to reduce boominess
- Angle: Tilt mic down slightly to avoid plosives (no pop filter needed with the A7WS windscreen)
- Switch Setting: Use mid-range boost if your voice is thin; bass rolloff if you're bass-heavy
Step 3: Build the Chain Right
- Interface with 48V phantom power (Scarlett 2i2+)
- Yoke mount (not clamps), SM7B's weight needs stability
- Single XLR cable (no daisy-chaining)
- Gain staging: Aim for peaks at -12dB before processing
Skip any step, and you'll chase 'fixes' forever. Nail this, and you'll achieve zero-post audio, raw tracks needing only light compression.
The Verdict: Who Should (and Shouldn't) Buy the SM7B
Yes, get it if:
- You record solo/interviews in noisy rooms (its off-axis rejection is unmatched)
- Your interface has <55dB clean gain (choose SM7dB to avoid Cloudlifter)
- You're on Phase 2+ of your upgrade path (interface + arm already owned)
No, skip it if:
- You're under $400 total budget (USB mic first)
- You use untreated rooms with major echo (treat the room first!)
- You need plug-and-play simplicity today (SM7dB fixes this; standard SM7B doesn't)
Final Advice: Invest in Steps, Not Symbols
The SM7B isn't 'magic'. It's a tool that excels only when integrated into a thoughtful system. Chasing it as a 'status purchase' burns cash and confidence. But approached as one step in your journey, starting with USB, then interface/arm, then the mic, it delivers legendary broadcast clarity without breaking the bank.
I'll never forget that student team. We grew their rig from two USB mics to a four-channel SM7B setup over 18 months, all by reusing mounts and arms. Each upgrade sounded better, cost less, and felt earned. No shoebox full of stranded gear. Just clear audio, semester after semester.
Buy steps, not regrets. Start where you are. Build what you need. Let your total cost of setup work for you, not against you. The SM7B (or SM7dB) can be worth it. But only if you sequence it right.
Your next step: Audit your current gear. Is your interface holding you back? Or your room? Fix the bottleneck first. Then, and only then, reach for the mic.
Related Articles