Best Vocal Condenser Mics for Home Studios Without Editing
By Nora Adeyemi • 16th Oct
That red 'peak' light on your best condenser vocal microphone isn't a judgment (it's a puzzle). As a studio microphone newbie recording in a bedroom or home office, you shouldn't need audio engineering wizardry to capture clean voice. You need a repeatable setup that sounds warm and intimate before hitting export. After guiding dozens of first-time podcasters through gain panic and pop filter struggles, I promise: confidence starts when you stop editing what your mic shouldn't have captured in the first place. Small, repeatable wins turn scary red lights into green.
Why This Matters for Your Untreated Room
Most reviews demo mics in echo-free studios with perfect voices (nothing like your space). You're recording now, not someday. You need zero-post audio that works today in rooms with HVAC hum, laptop fans, and neighbor noise. Forget "ideal" specs. Let's solve what keeps you up at night: plosives that crackle, voices that sound thin or shouty, and hours wasted on noise reduction.
Green lights, not perfect waves. That's the goal.
Your Top Questions, Answered Straight
Q: Why choose a condenser mic when my room's untreated?
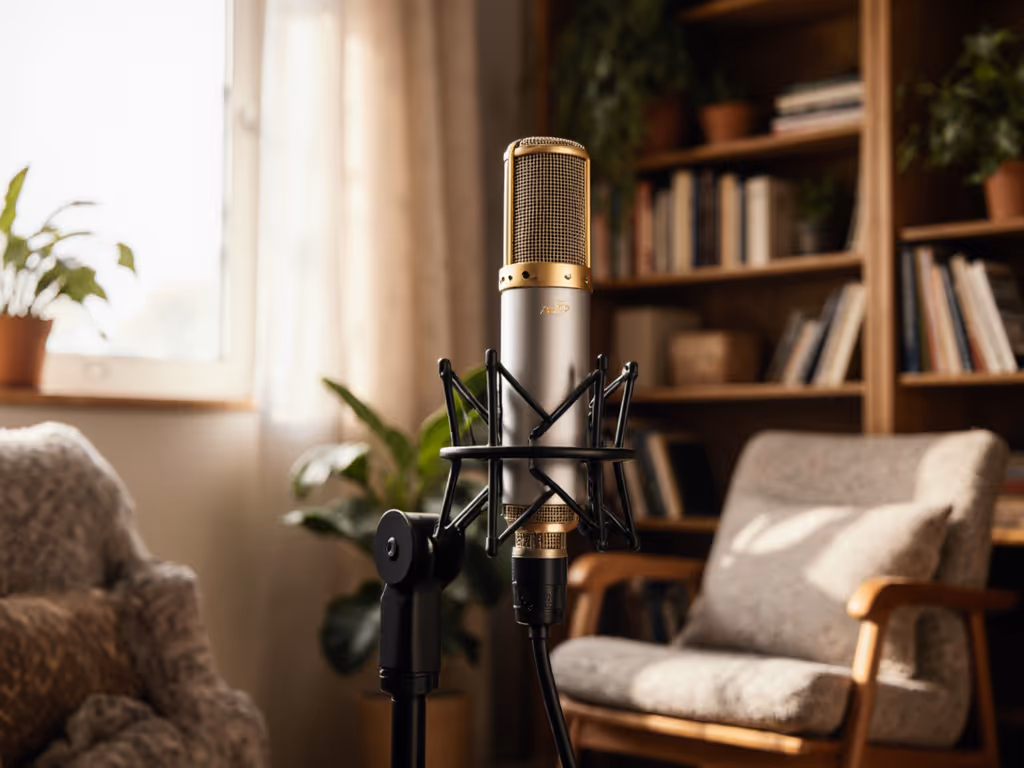
Condensers capture vocal nuance better than dynamics, but only if you control proximity and placement. Large diaphragm condensers excel at intimacy, but they're sensitive. Good news: modern entry-level models like the RØDE NT1 Signature Series tame this brilliantly for home use.
Your fix: Always use off-axis technique (angle the mic 15-30° off your mouth). This reduces plosives and harsh sibilance without editing. Pair it with a pop filter placed fist-width distance from your lips (not the mic!). I watched a host clutch her mic like an ice cream cone (peaking every laugh) until we locked this simple angle. Her shoulders dropped, and the story finally breathed.
Q: Which mic handles room echo best without treatment?
Cardioid polar pattern is non-negotiable. It rejects sound from the sides/back (critical for bedrooms). But not all cardioids are equal. Look for tight rejection specs (e.g., -15dB at 120°) and ultra-low self-noise (under 10dBA). Why? High noise floors amplify room hum when you boost gain.
Reality check: No mic erases untreated rooms. But these minimize damage: For quick wins in echoey bedrooms, see our room acoustics guide.
- Budget champ ($160): RØDE NT1 Signature Series
With 4dBA self-noise (the quietest in class), it captures subtle breaths without amplifying computer fans. Its cardioid pattern rejects desk thumps, and the included studio-grade shock mount kills handling noise. Perfect for thin voices needing warmth. Just avoid blasting AC vents toward it.
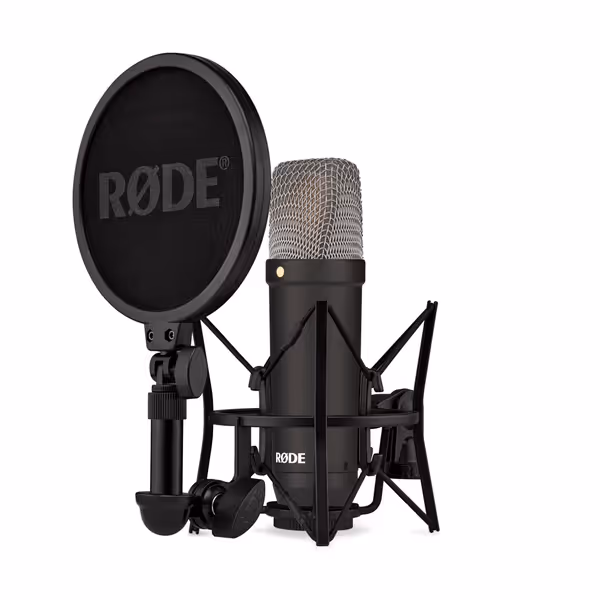
RØDE NT1 Signature Series Condenser Microphone
Achieve professional-grade audio with pristine clarity and natural vocal reproduction.
$159
Self-Noise4dBA (Extremely Low)
Self-Noise4dBA (Extremely Low)
Pros
Broadcast-ready sound with exceptional vocal clarity.
Comes with studio-grade shock mount, pop filter, and XLR cable.
Durable, premium build quality backed by a 10-year warranty.
Cons
Condenser design may pick up more room ambiance.
Customers find this microphone to be professional-grade with beautiful sound quality that makes voices sound natural, and appreciate its value for money. The microphone works well and is easy to set up...
Customers find this microphone to be professional-grade with beautiful sound quality that makes voices sound natural, and appreciate its value for money. The microphone works well and is easy to set up...
-
Mid-tier hero ($330): Audio-Technica AT4040
A workhorse with 82dB signal-to-noise ratio. Less forgiving than the RØDE on background noise, but delivers smooth, natural vocals that resist sibilance. Ships with a basic mount, and upgrading to a shock mount (like the RØDE PSM1) is worth $30. Ideal if your room has rugs/furniture. -
Pro splurge ($1,200): Neumann TLM 103
Legendary clarity, but only if you have basic treatment (blankets on walls, rugs). Its deep low-end loves sonorous voices but will amplify room boom in untreated spaces. Requires 48V phantom power and a clean interface. Not for beginners, yet unbeatable for podcasters upgrading from USB.
Key insight: In noisy rooms, the RØDE's lower noise floor often beats pricier mics. Prioritize self-noise over brand hype.
Q: How do I avoid editing hell with inconsistent volume?
Direct monitoring is your secret weapon. Plug headphones directly into your audio interface (not via software). This eliminates latency that causes you to over-sing. Then:
- Set gain so your loudest phrase hits -12dB (no peaks!)
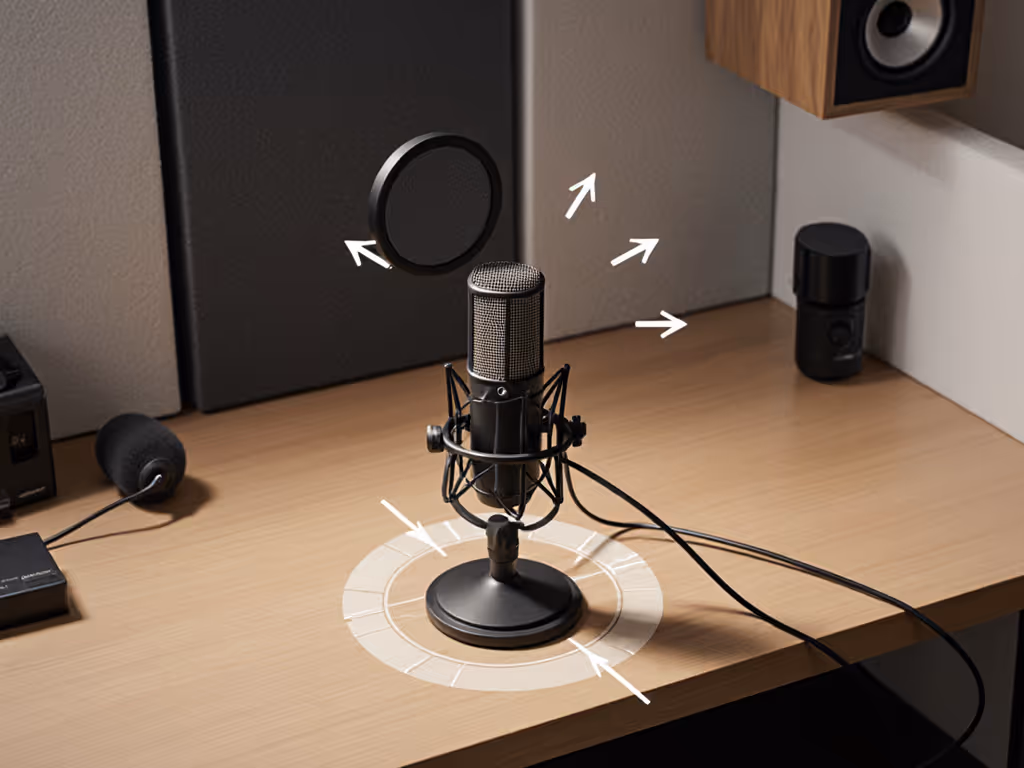
- Lock fist-width distance from pop filter (measure with your hand!)
- Angle slightly off-axis (15°) for consistent tone
This creates repeatable setup magic. For exact level targets and workflow, follow our gain staging guide. No more guessing if take 3 is quieter than take 1. One mic position, one gain setting, every time. I've seen hosts ditch noise reduction plugins completely after nailing this.
Q: What's the real budget priority for zero-post audio?
Spend 70% on the mic, 30% on interface/shock mount. Skip "studio bundles" with cheap pop filters. Instead:
- Under $200: RØDE NT1 Signature Series + used interface (Focusrite Scarlett 2i2)
- $300-$500: Audio-Technica AT4040 + RØDE PSM1 shock mount ($40) + basic interface
- $1,000+: Neumann TLM 103 + high-gain interface (Universal Audio Volt 276)
Critical: Never skip a shock mount, it's cheaper than editing out desk thumps. And room choice matters more than you think: closets and padded bathrooms often beat bedrooms for quick recordings.
Q: "Warm vocal mics" sound great, but will mine work for my voice?
"Warm" usually means reduced harsh highs. If you're nasally or sibilant, avoid mics boosting 5-10kHz (like vintage U87s). Instead:
- Thin/high voices: RØDE NT1 Signature (smooth top-end)
- Deep/boomy voices: AT4040 (controlled low-end)
- Shouty projection: Neumann TLM 103 (handles SPL like a champ)
Try before you buy: Many retailers offer 30-day returns. Test mics with your actual recording chain (interface + headphones) for 24 hours. Listen for breath noise and plosives (not just "clean" clips).
The Action You Can Take Today
Stop comparing frequency response charts. Your next step is tactile:
- Grab a pencil and set fist-width distance from your mouth to where the pop filter should be
- Angle your current mic 15° off-axis (use phone flashlight to check alignment)
- Enable direct monitoring and read 3 sentences at normal volume
Did plosives vanish? Is your voice consistently loud? That's the repeatable setup winning. If yes, scale up. If not, try the RØDE NT1 Signature Series (it solves this for 80% of beginners). Your audience hears confidence, not specs.
Green lights, not perfect waves. Now go record.
Related Articles